the promised pictures will be posted soon.
anyhooo, yesterday i recieved my latest installment for my Mortifactors, 5 assault marines, Dante and Ezekiel. for the upcoming BA codex i am focusing my efforts at creating a strong assault force from my shooty marine army.
these five assault marines will be accompanied by five more once theyre painted. i will also make great use of my redeemer which im in the middle of painting at the moment, this will be filled with my space hulk termies painted as mortifactors with all BA iconography removed or covered.
on the non assault points i will be using dreadnoughts, i have the one from AoBR already and will get atleast two more in a foreseeable future, one of those furioso dreads and a venerable i guess.
but right now im mostly painting and building my force in anticipation of what the codex will look like....
torsdag 25 februari 2010
måndag 15 februari 2010
Gone for a while
as the title sys ive been gone for a while, dont think im not doing anything but at this moment im mostly working myself up over the Blood angel codex and all the minis that it will give us, i will play my Mortifactor army as Blood angels.
since i have a bunch of painted minis already all i have to do is add the new ones when they arrive to fill out or complement.
i also started Warmachine recently and joined a league to get some playtime, pics will be flooding these pages soon.
since i have a bunch of painted minis already all i have to do is add the new ones when they arrive to fill out or complement.
i also started Warmachine recently and joined a league to get some playtime, pics will be flooding these pages soon.
lördag 9 januari 2010
Look what i found browsing though my PB account
its a mini tutorial in freehand painting, this is the simplest one ive ever made but i think it really explains the basics of what i do.
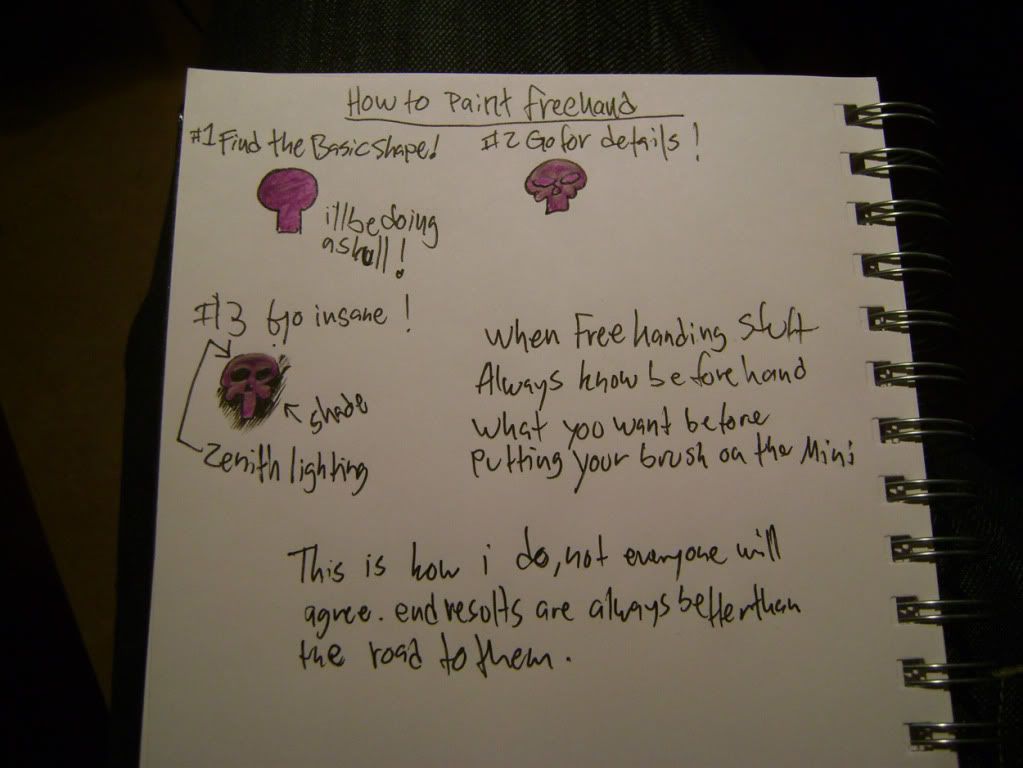
a bit simple as said....
more stuff will be coming up soon, im working as hard as i can to get more minis to show, more new minis that is :D
//Dennis

a bit simple as said....
more stuff will be coming up soon, im working as hard as i can to get more minis to show, more new minis that is :D
//Dennis
tisdag 5 januari 2010
Taking a break from anthropology studies...
...gave me the time to do this:
its about 3 hours into the process and the skin is almost done, now on to the disgusting stuff...moahahahhaa.....

its about 3 hours into the process and the skin is almost done, now on to the disgusting stuff...moahahahhaa.....
Fur! you say...
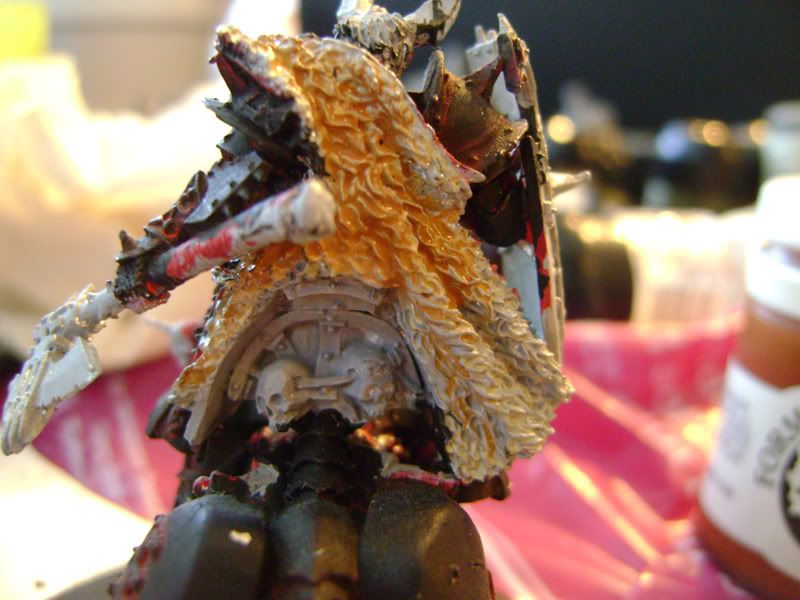
so on request i tried to paint what 90% of the GW gaming community seem to be painting, wolf-fur. this is not the definite guide, nor do i claim to have the answrs needed and i do confess that it could look better, but just tweak it a bit and i bet you´ll find it sufficient. the mini is not a space wolf, its something far more sinister, the lord of khorne on juggernaught....
as usual i started off with a fortress grey basecoat, this was then given a quick wash of p3 menoth white base (sort of bleached bone).
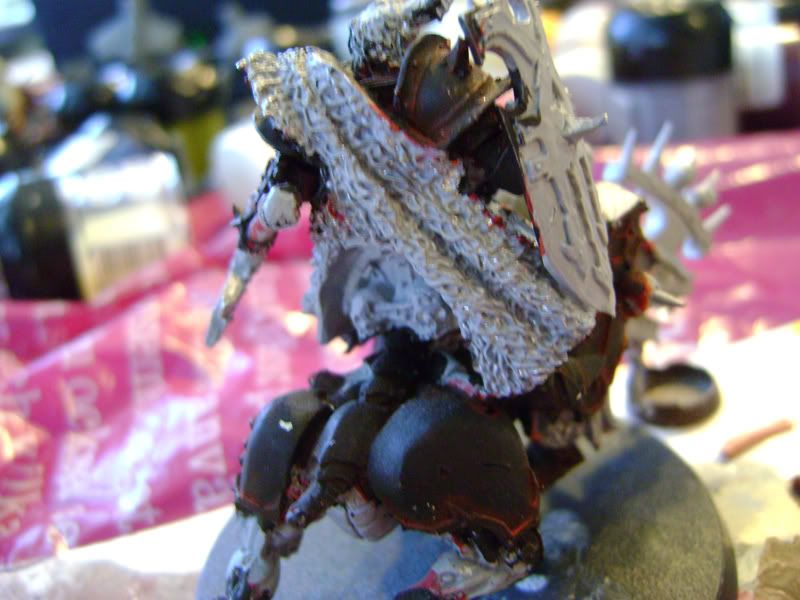
this was then again shaded in the middle to keep the lighter colours towards the edges of the fur, this happens to look better than a covering layer, dont ask me why.
the shade was done with P3 bloodstone, the jar is in the pic for all out there that dont use this colour, just match whatever you use...
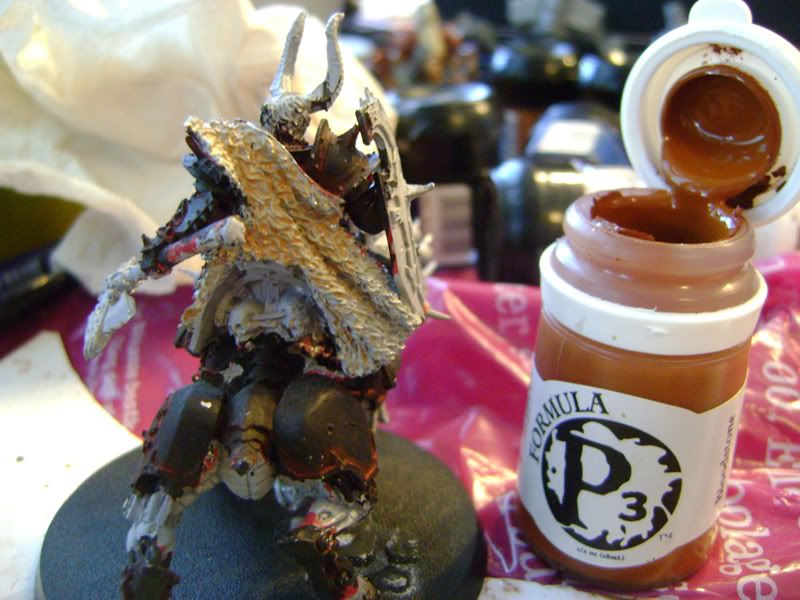
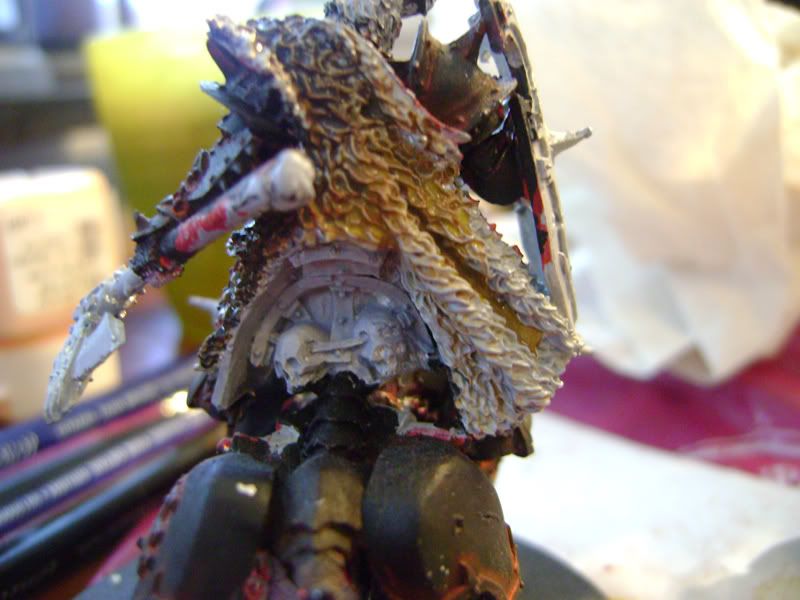
some more of that...
i then added umbral umber from the P3 line to this, its a dark brown colour, scorched brown from GW could do it i guess, with this i kept going at it in the middle making sure to leave some of the lighter colour towards the edges. as a final shade i added some black to this and splashed that on in a controlled manner in the middle:
to finish the fur i started highlighting individual strands using P3 Menoth white base-menoth white highlight-skull white from GW (bleached bone-50/50 bleached bone and white-skull white)the lightest coloyrs were reserved for the lightest parts of the fur, the dark areas did not get any highlights since i felt that the colour they had was nice enough.
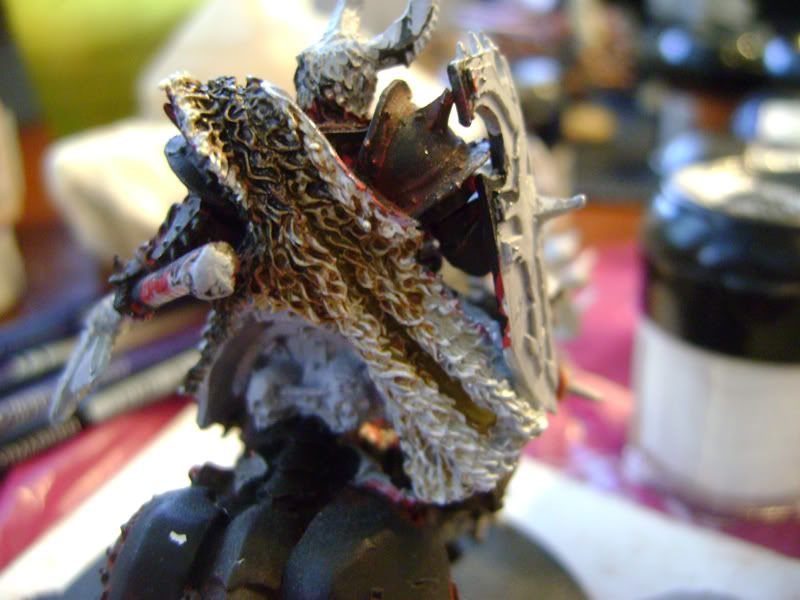
and to finish the area i painted the skin of the furry friend in the same manner as i usually paint normal "human" skin to keep with the warm colours of the mini....
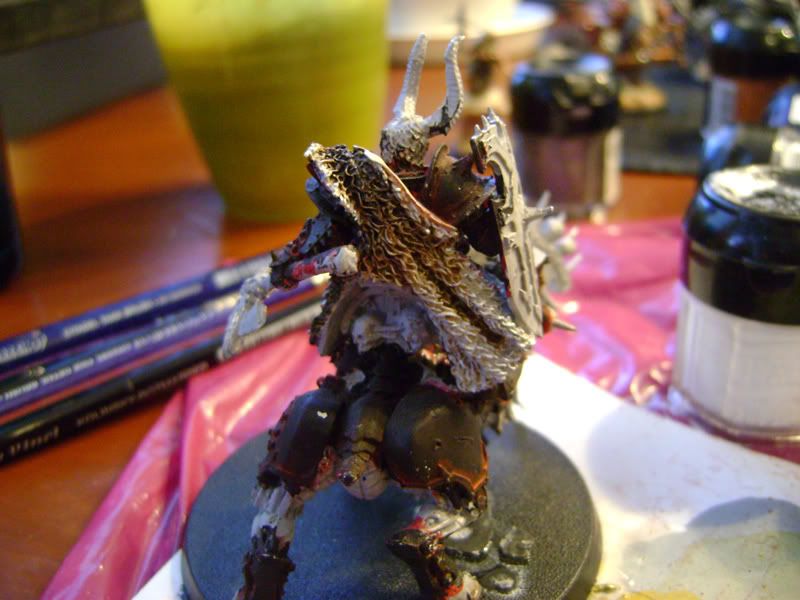
hopefully this helps in some way, i dont know....im just a stressed out student/father :D
as usual i started off with a fortress grey basecoat, this was then given a quick wash of p3 menoth white base (sort of bleached bone).

this was then again shaded in the middle to keep the lighter colours towards the edges of the fur, this happens to look better than a covering layer, dont ask me why.
the shade was done with P3 bloodstone, the jar is in the pic for all out there that dont use this colour, just match whatever you use...

some more of that...

i then added umbral umber from the P3 line to this, its a dark brown colour, scorched brown from GW could do it i guess, with this i kept going at it in the middle making sure to leave some of the lighter colour towards the edges. as a final shade i added some black to this and splashed that on in a controlled manner in the middle:

to finish the fur i started highlighting individual strands using P3 Menoth white base-menoth white highlight-skull white from GW (bleached bone-50/50 bleached bone and white-skull white)the lightest coloyrs were reserved for the lightest parts of the fur, the dark areas did not get any highlights since i felt that the colour they had was nice enough.

and to finish the area i painted the skin of the furry friend in the same manner as i usually paint normal "human" skin to keep with the warm colours of the mini....

hopefully this helps in some way, i dont know....im just a stressed out student/father :D
måndag 28 december 2009
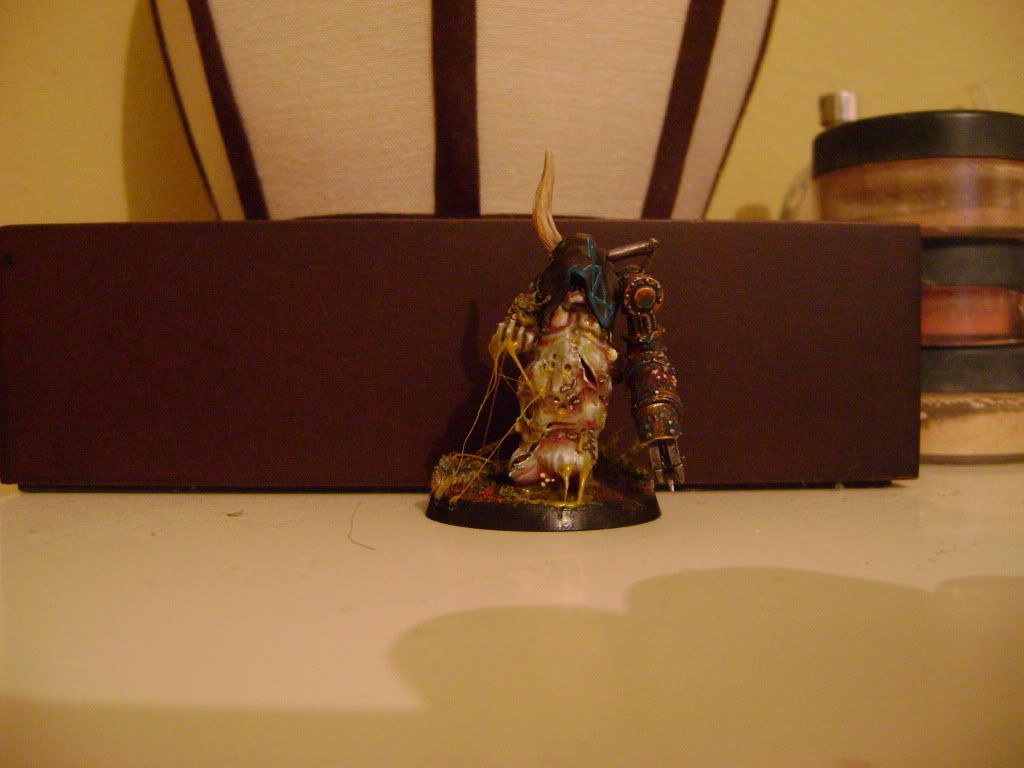
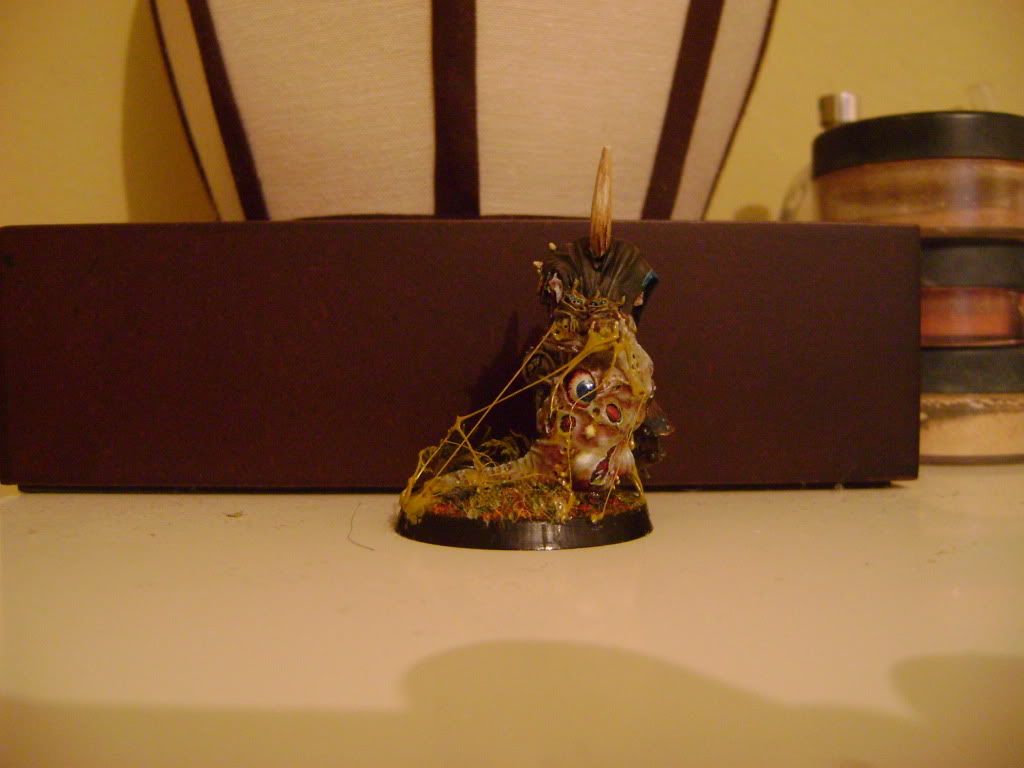
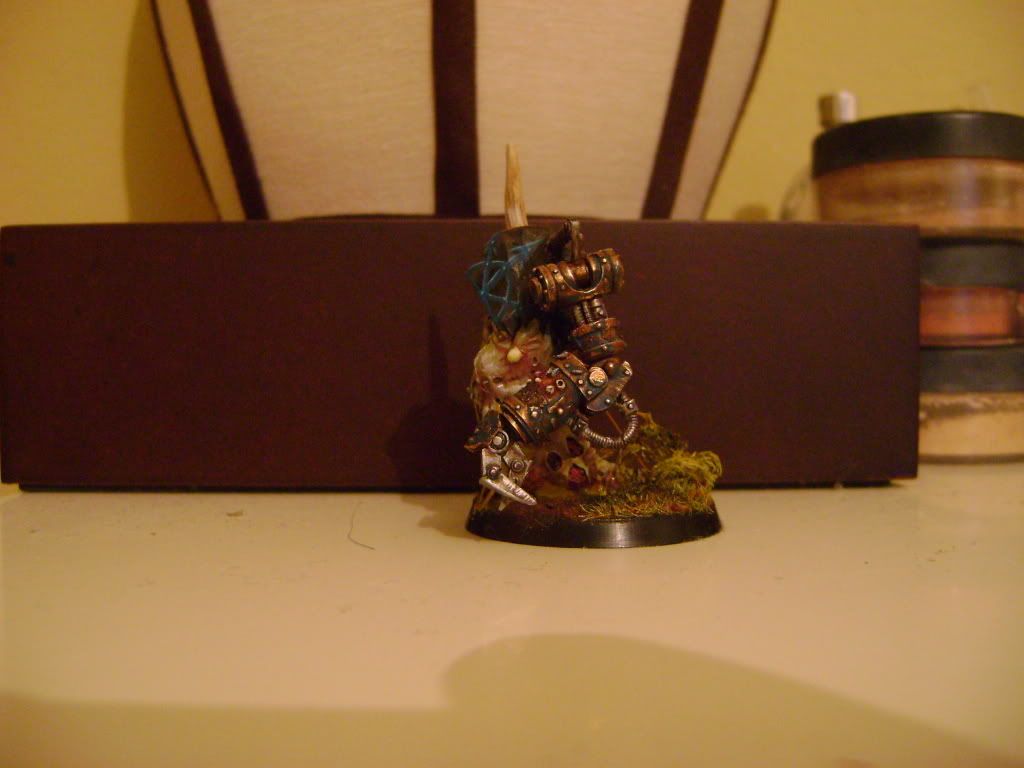
Herald of nurgle
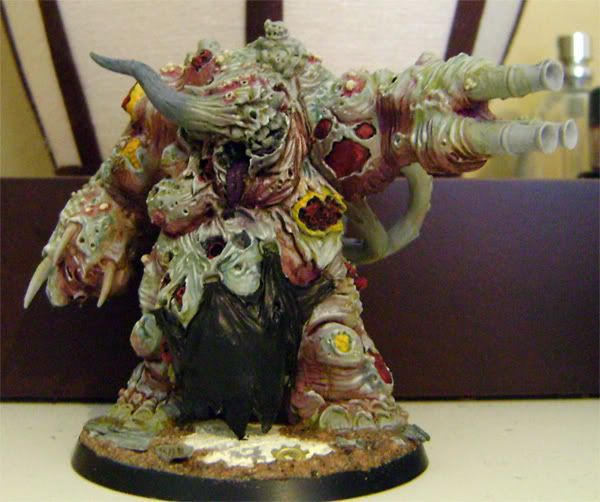
finally its finished and i have pics...
enjoy, i will try to get some better pics some day but i felt that i had to get this online now!!
enjoy, i will try to get some better pics some day but i felt that i had to get this online now!!


Faces/skin tutorial
this has to be the simplest tutorial of this painting phenomenon ever made, i did it in 25 minutes so the mini is not all that it can be so to say.
its all about colour theory and knowing that skin is not beige/brown/pink/whatever, its alot more complicated than that, in fact its to complicated to hastily recreate on a mini in this scale. but there is lots of colour in our skin that we take for granted and alot of people ignore them when painting it.
in this example i use a standard metal space marine scout from GW. the colours are from a variety of manufacturers and the colours are all over the place i guess.
skin colours:
P3 khardic flesh
GW Catachan green
P3 beaten purple
Rackham pearly flesh
GW skull white
teeth:
P3 Menoth white base
P3 Menoth white highlight
eyes:
P3 Menoth white highlight
GW chaos black
so to get a quick idea i created this picture of all the stages (kind of) and i will write some to complement it aswell.
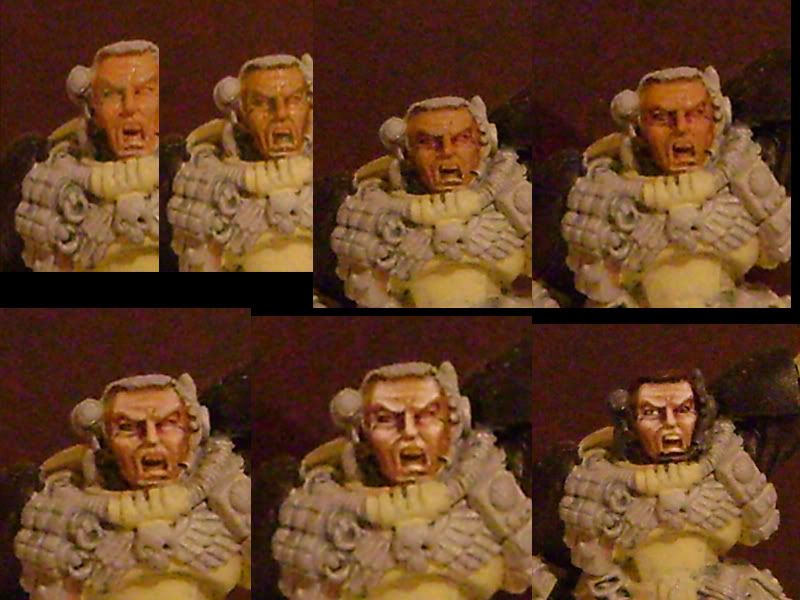
Picture 1
a fortress grey basecoat is covered with some khardic flesh, i use grey because i like it and i think it works best, matter of taste i guess.
pic 2
i shade this using the green as a wash, make sure you think about lighting when doing this as it will help later.
pic 3
the purple was added as a wash to the hollows of the eyes to make him look a bit angrier.
pic 4
clean up time, go back over the mini with khardic flesh. keep the shades in the recesses.
pic 5
this was taken after ive been mixing pearly flesh with khardic flesh for about 3-4 highlights always going one nuance lighter. do this up to pure pearly flesh.
pic 6
here i added white to the pearly flesh, going up to pure white, during these highlights stages the lighting is very important to remember. i use a zenithal light on this mini which means that the lightsource is situated somewhere above the mini (straight up).
pic 7
the eyes and teeth are painted, no need for any deeper instructions here i guess. the surrounding areas were given a basic coat to make the face stand out more and not look so messy.
im sorry the pic is a bit bad but hopefully you understand what i have done.
cheers and thanks for looking.
Prenumerera på:
Inlägg (Atom)

